JWT Project - Firebase/Php-JWT - Introduction
JWT - JSON Web Tokens

In this project tutorial we will create a new Php project and will use Firebase/Php-JWT package to generate JSON Web Tokens.
In the introduction tutorial we learned about JWT. Feel free to check that out.
Requirement
We will need the following for this project.
- Local PHP development environment. Try MAMP/XAMPP/WAMP.
- Composer the package manager.
- firebase/php-jwt package to generate JWT and validate it.
You can find the code of this project in my GitHub repository jwt-php-project.
Lets get started.
Create a new project
Open your favourite text editor or IDE and create a new PHP project folder.
For this tutorial I am naming my project jwt-php-project.
$ mkdir jwt-php-project && cd jwt-php-project
Get firebase/php-jwt package
Get firebase/php-jwt package using composer and typing the following command composer require firebase/php-jwt.
$ composer require firebase/php-jwt
Using version ^5.0 for firebase/php-jwt
./composer.json has been created
Loading composer repositories with package information
Updating dependencies (including require-dev)
Package operations: 1 install, 0 updates, 0 removals
  - Installing firebase/php-jwt (v5.0.0) Downloading: 100%
Writing lock file
Generating autoload files
At the time of writing this tutorial I am using firebase/php-jwt version 5.0.0.
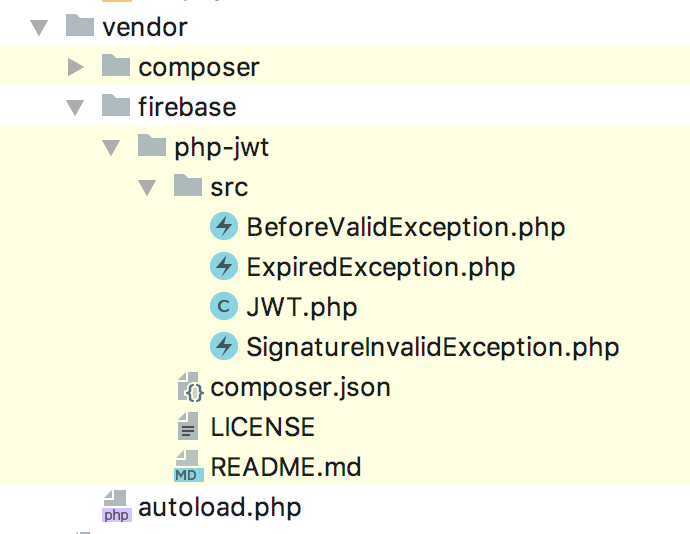
The above command will create the vendor directory and will download firebase/php-jwt package inside it.

Create index.php file
Create an index.php file in the project folder.
In this file we will create a login form.
Create a login form
Inside the index.php file create a login form.
<form id="login">
  <div class="form-group">
    <label for="email">Email</label>
    <input type="email"
         maxlength="255"
         class="form-control"
         id="login-email"
         required>
  </div>
  <div class="form-group">
    <label for="password">Password</label>
    <input type="password"
         maxlength="32"
         class="form-control"
         id="login-password"
         required>
  </div>
  <div class="form-group">
    <input type="submit" class="btn btn-primary" value="Log in">
  </div>
</form>
This form contains an email field and a password field and a login button.
On successful login it will generate a JWT for the user which we will later use to fetch the user detail.
Create a script.js file
Inside the project folder create a script.js file inside the js folder. This will hold the JavaScript code to send and receive data from the server.
Include this file in the index.php file.
index.php file
Our index page will look like the following.
<!doctype html>
<html lang="en">
<head>
  <!-- Required meta tags -->
  <meta charset="utf-8">
  <meta name="viewport" content="width=device-width, initial-scale=1, shrink-to-fit=no">

  <!-- Bootstrap CSS -->
  <link rel="stylesheet" href="https://maxcdn.bootstrapcdn.com/bootstrap/4.0.0/css/bootstrap.min.css">

  <title>JWT PHP Project by Yusuf Shakeel</title>
</head>
<body>

<div class="container">
  <div class="row">
    <div class="col-xs-12 offset-sm-4 col-sm-4">
      <h3 class="text-center">jwt-php-project</h3>
      <br>
      <h4 class="text-center">Login</h4>
      <form id="login">
        <div class="form-group">
          <label for="email">Email</label>
          <input type="email"
               maxlength="255"
               class="form-control"
               id="login-email"
               required>
        </div>
        <div class="form-group">
          <label for="password">Password</label>
          <input type="password"
               maxlength="32"
               class="form-control"
               id="login-password"
               required>
        </div>
        <div class="form-group">
          <input type="submit" class="btn btn-primary" value="Log in">
        </div>
      </form>
    </div>
    <div class="col-xs-12 offset-sm-4 col-sm-4">
      <hr>
      <div id="result-container"></div>
    </div>
  </div>
</div>


<!-- Optional JavaScript -->
<!-- jQuery first, then Popper.js, then Bootstrap JS -->
<script src="https://code.jquery.com/jquery-3.2.1.min.js"></script>
<script src="https://cdnjs.cloudflare.com/ajax/libs/popper.js/1.12.9/umd/popper.min.js"></script>
<script src="https://maxcdn.bootstrapcdn.com/bootstrap/4.0.0/js/bootstrap.min.js"></script>

<script src="js/script.js"></script>
</body>
</html>
By now our project index.php page will look like the following.

For this demo project I am using Twitter Bootstrap v4.0 to style the page.
This brings us to the end of this introduction tutorial. In the next tutorial we will work on the PHP script to generate JWT for the users.
See you in the next tutorial.
ADVERTISEMENT